
The form is where your leads will fill in their information on your website. You have a couple options when it comes to creating forms.
1.) Create forms within Insty.pages (easiest)
2.) Create forms within Engage ( easy, not as pretty)
This article will show you how to create a form within Insty Engage Pro.
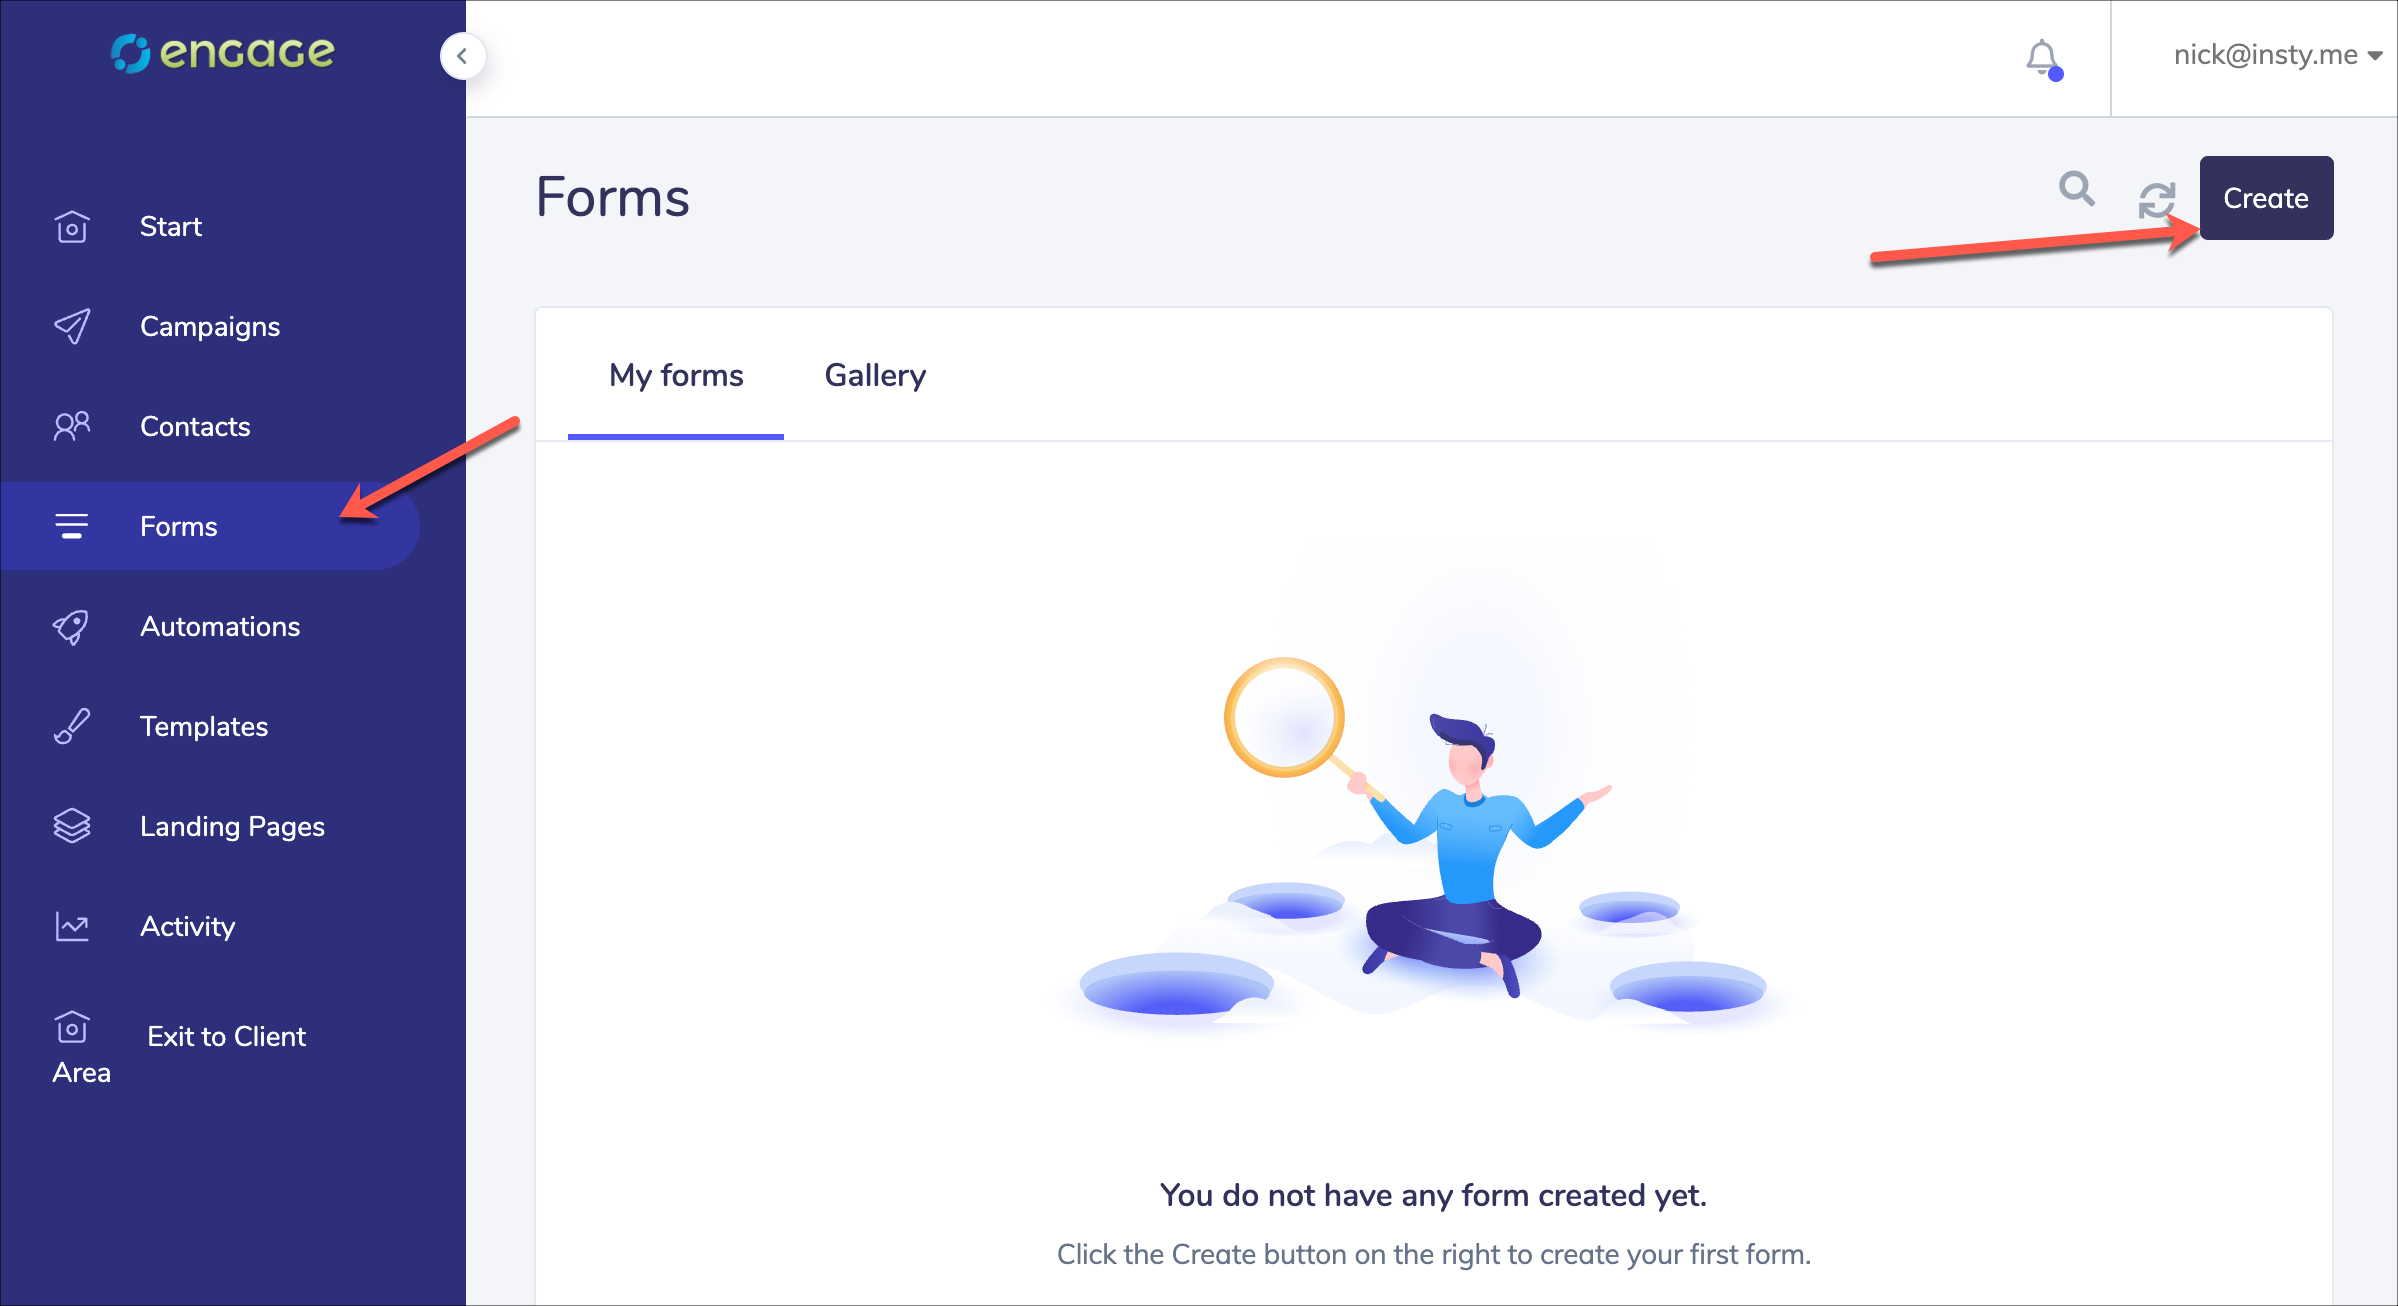
1.) Login to your Engage system and choose 'Forms' from the menu list. Then select 'Create' button in the upper right.
2.) Build your form, name it, and make sure to set the list you want the leads to go into:
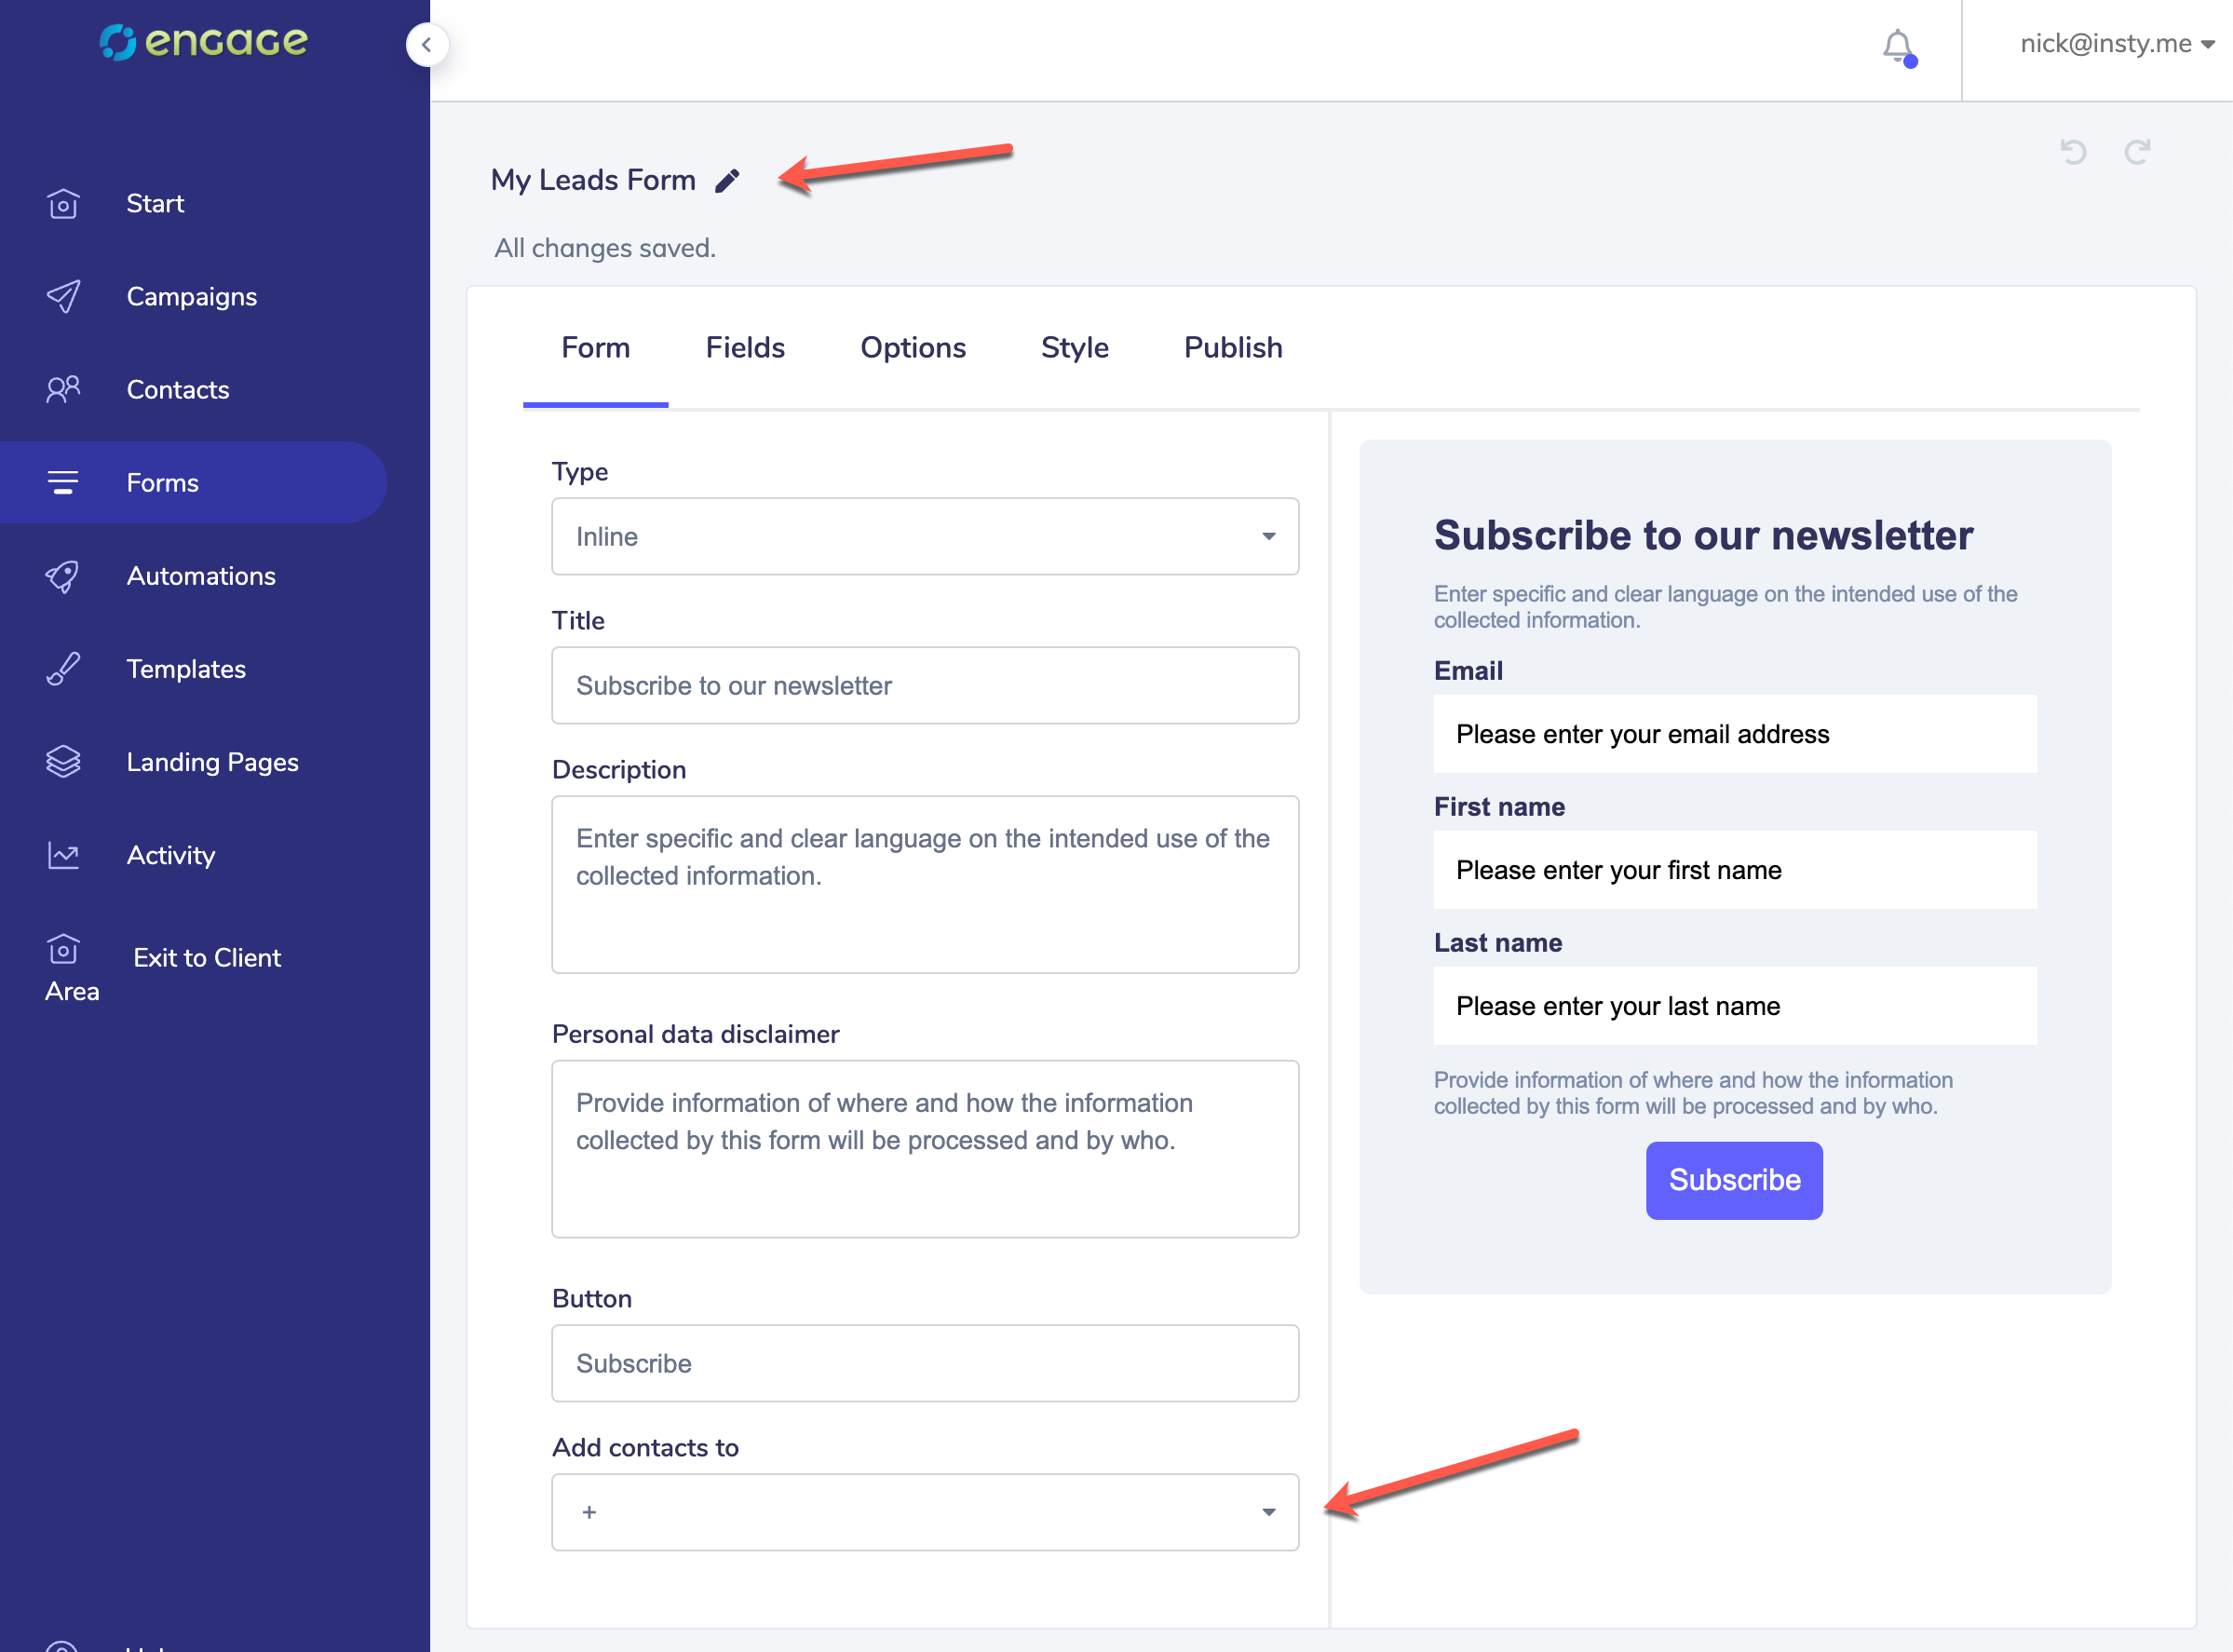
Use the Fields, Options, Style to set the different look and feel options for your form.
3.) When you are ready to publish your form, get the publish code.
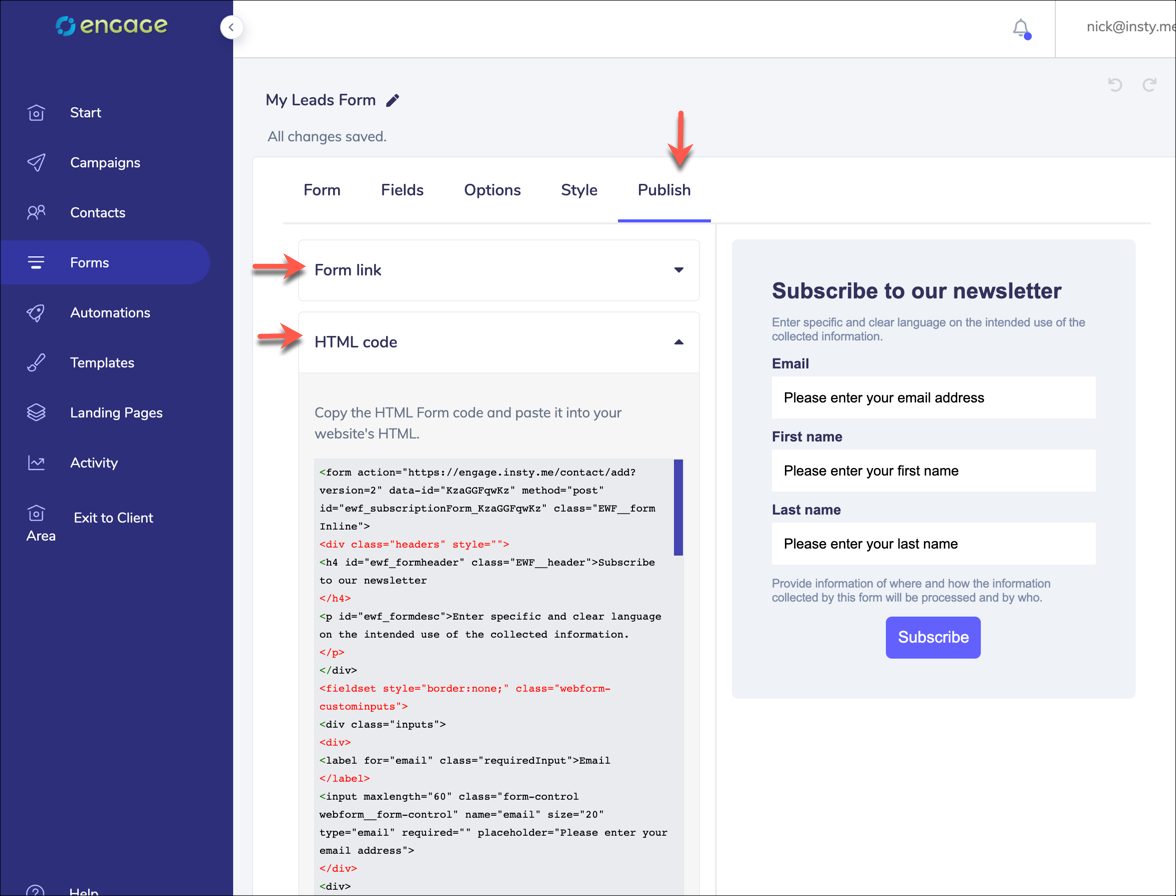
The 'Link' code will create a link that you can send traffic to for a simple opt-in form page. It will look like this: https://engage.insty.me/form?lid=_QMOF_GofJ3XFiTHmSp9SA2
The HTML code is what you'll want to use for embedding your form into pages, wordpress posts and other websites. You'll want to copy and paste the entire HTML code and use that in your website.
NOTE * - depending on the theme you are using in Wordpress, the styling you set in the form builder may be overridden by your theme. So, if your form looks different inside your WP site than it does in the form builder, you may have to use a different form on your WP site.
If that's the case, checkout the Insty Pages WP Form builder plugin and use insty pages to create your opt-in form.